3.1.2 DETECTION ZONE CONFIGURATION
Detection zone
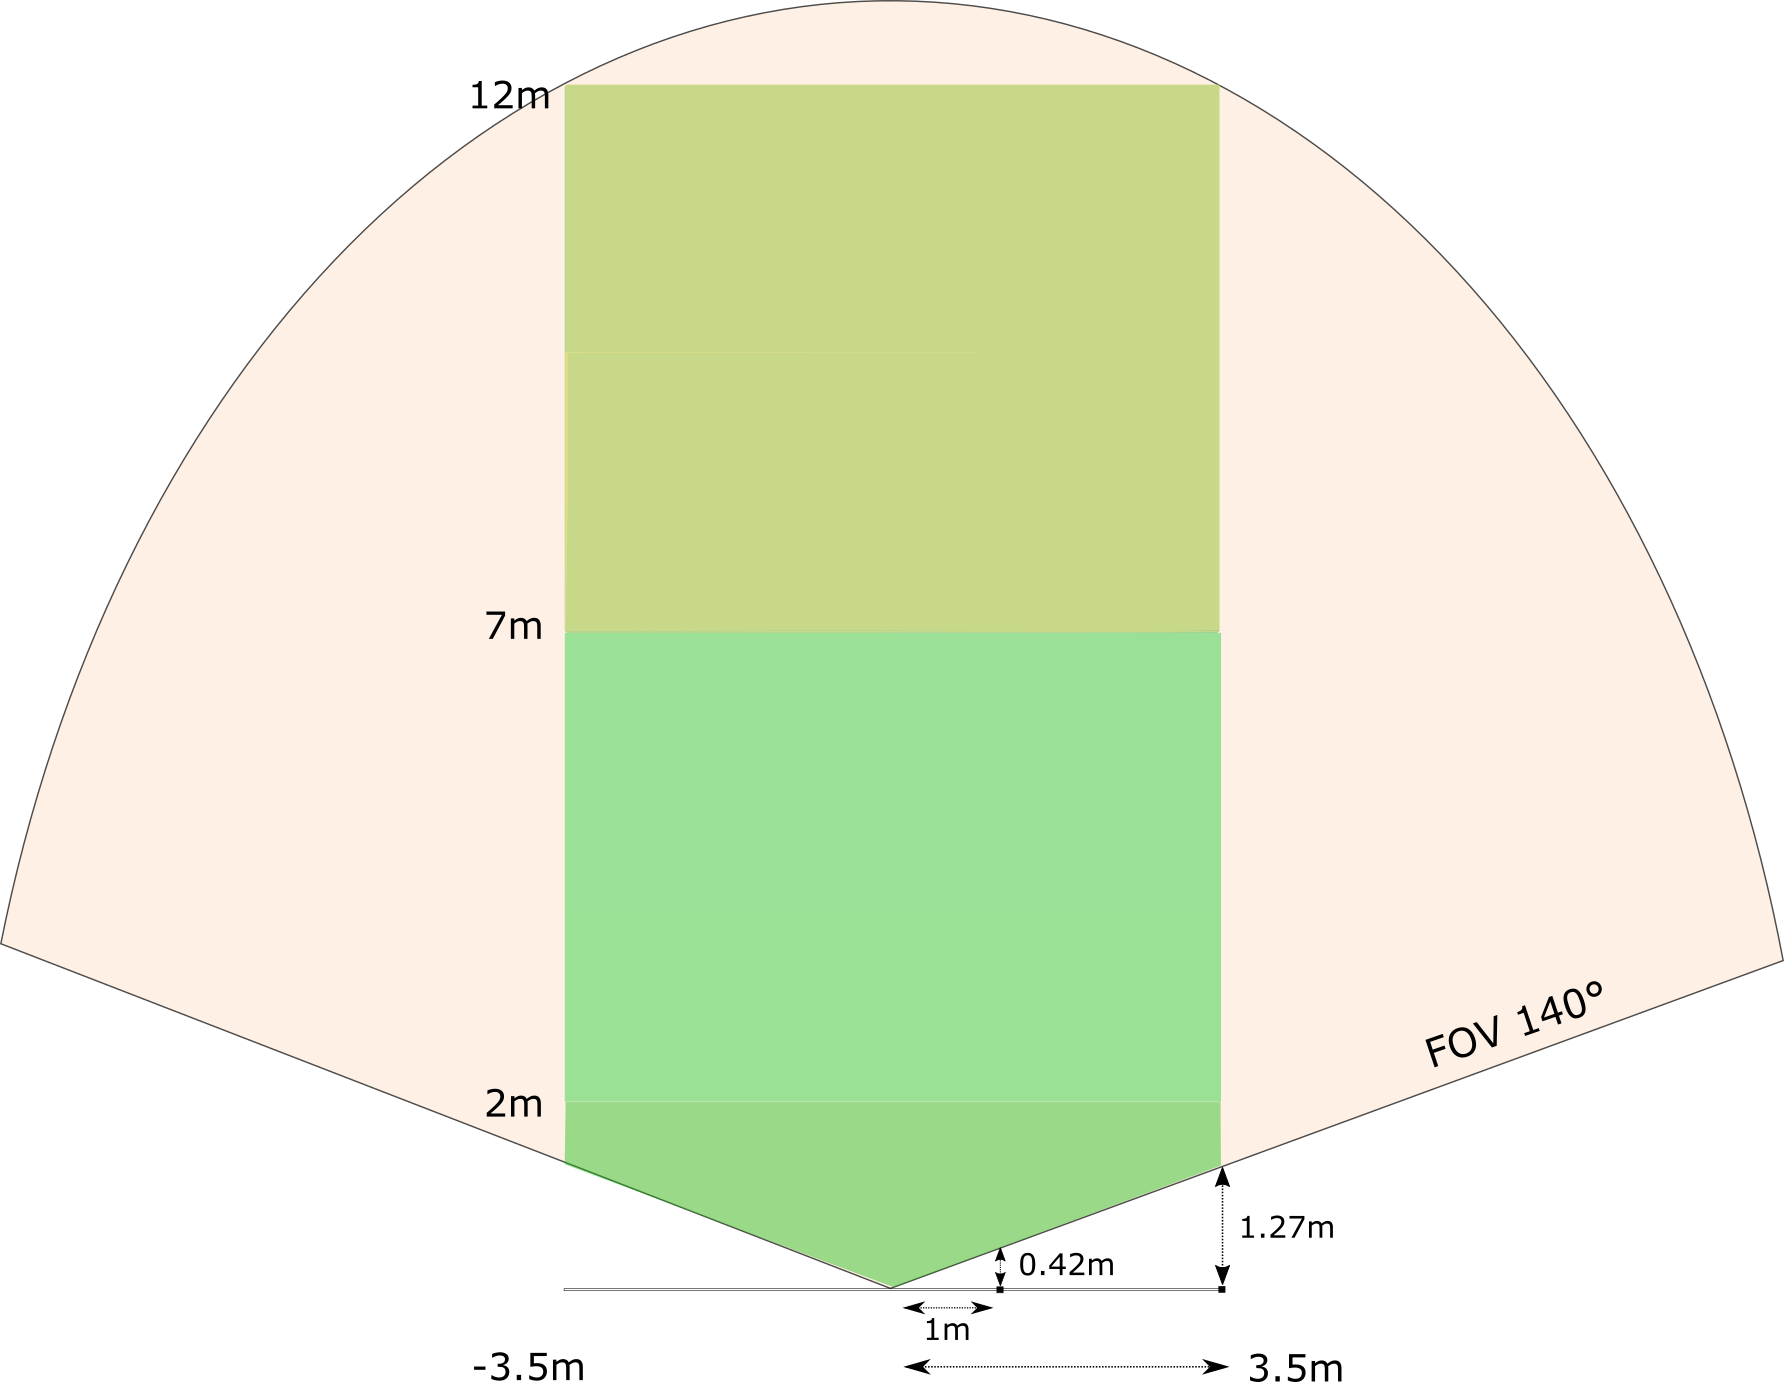
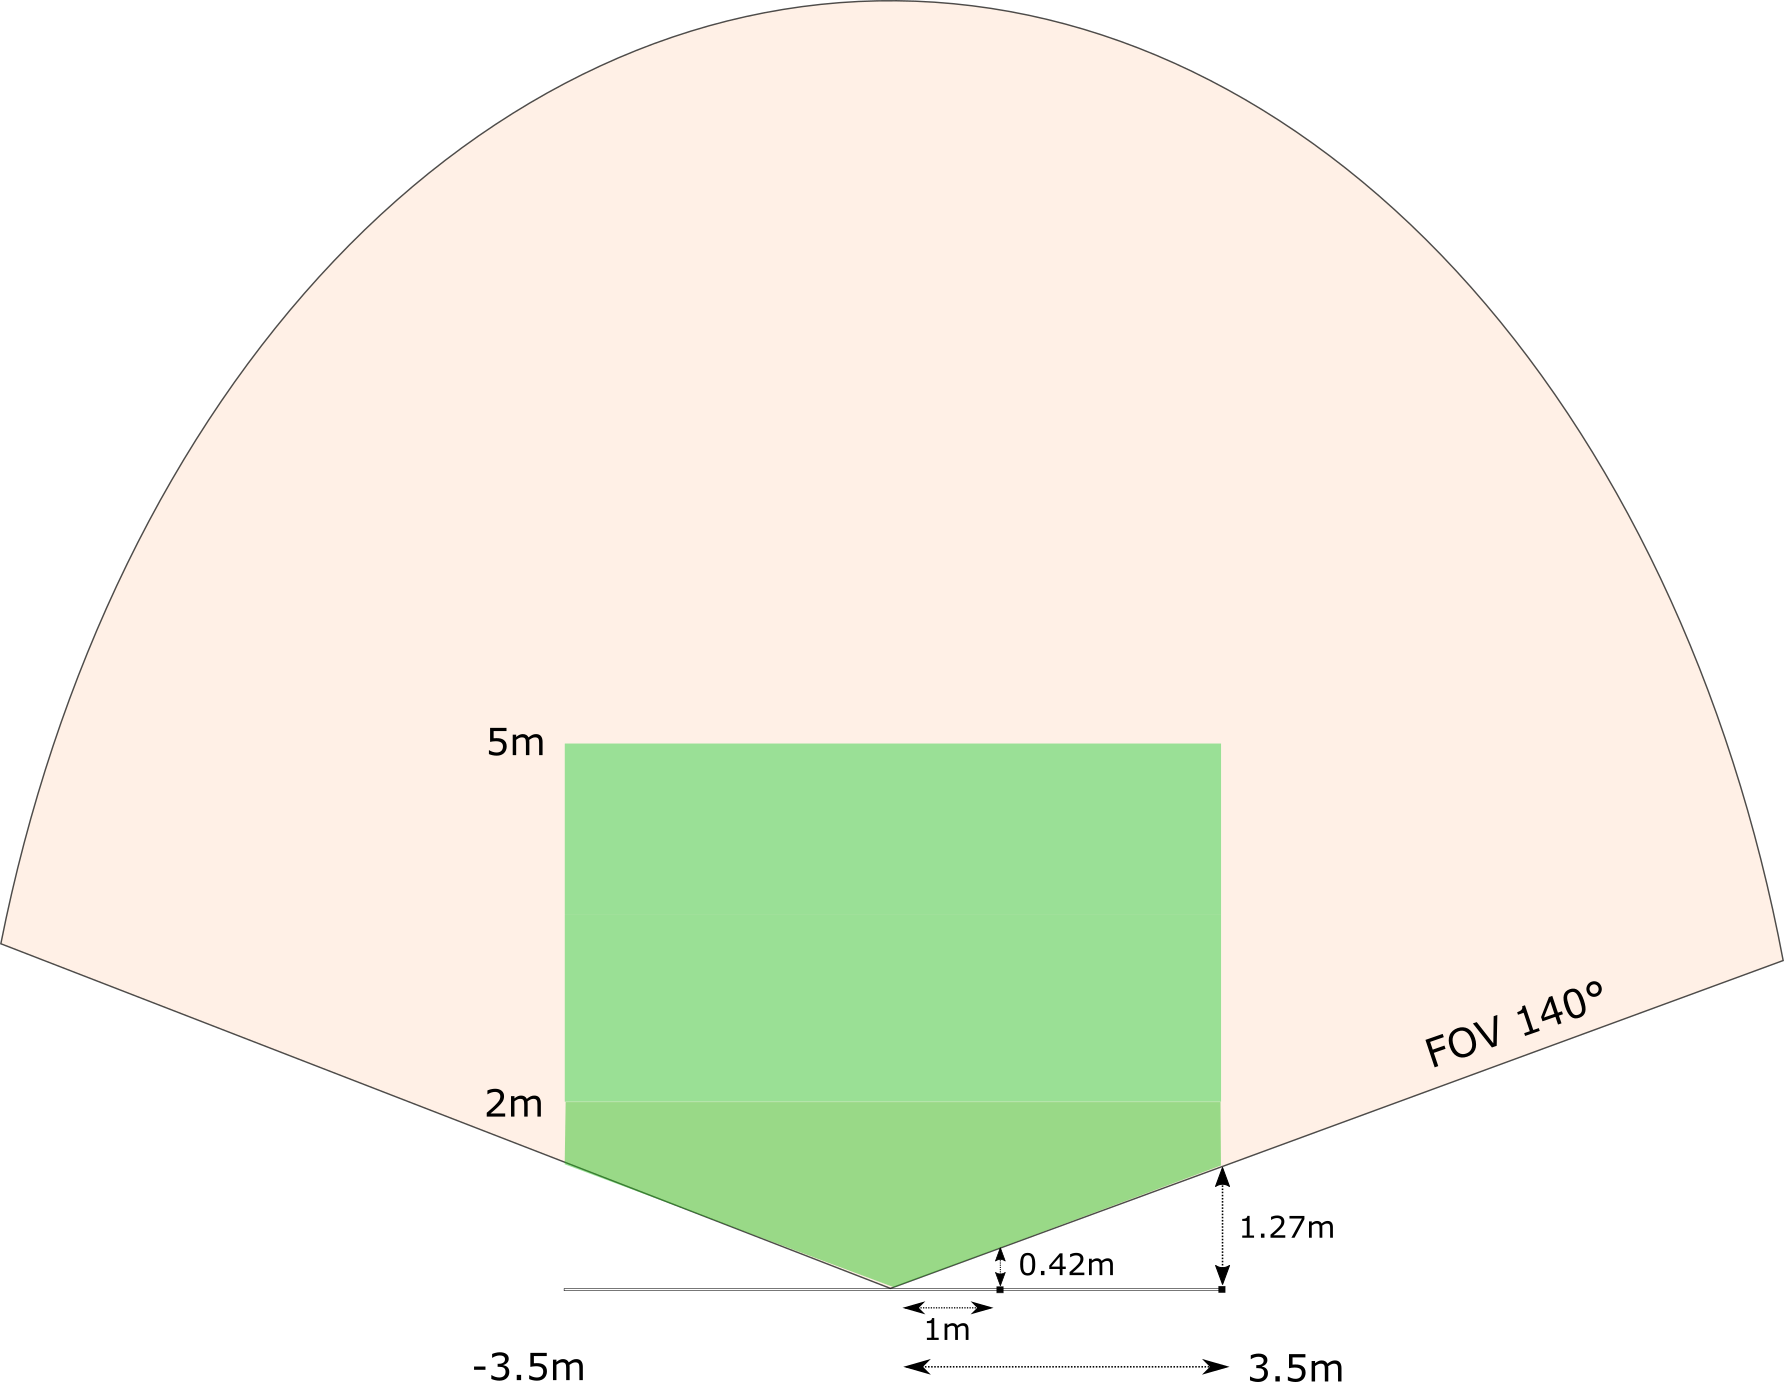
FoV and detection zone | |
MR120/MR120A (Single camera and two cameras in alternate display mode configuration) | SR240 |
 |  |
|
For optimal detection performance, configure the zone between length = 7m and width = 7m (23ftx23ft) |
For optimal detection performance, configure the zone between length = 5m and width = 5m (16.4ftx16.4ft) |
|
What happen for length upper than 7 meters? Configuration between 7 meters and 12m are possible as system works properly but the system performance are not fully caracterized. The installation require a check by the Blaxtair Team to ensure nominal performance What happen for length upper than 12 meters? Performances are not guaranteed |
What happen for length upper than 5 meters? Performances are not guaranteed |
Contact us by email at :
Note for Blaxtair team (not visible on the customer doc)
Installation between 7 and 12 meters for a MR120/MR120A are not fully caracterized. As a result the installation can not be characterized in a general way but in a specific way.
The question that needs to be ask to the customer that ask for these installation:
if the customer is an OEM, it must be ensured that:
the machine's working environment is outdoors
installation height is close to 3m
sufficient lighting at maximum range
send the SNs to the AI team for (this is an action, not a condition)
monitor behavior during the first 3 months
enrich our database during the first 6 months
if not, we'll go ahead with the installation, as we think it should work fine in general
send SNs to the AI team for (this is an action, not a condition)
monitor behavior for the first 3 months
enrich our database during the first 6 months
Installation upper than 12 meters for a MR120/MR120A and 5 meters for a SR240 have knowed less efficient performances. It is up to the customer to carry out tests and validate by themselves if the bahavior of the detection meet their needs (knowing that we fear at Arcure that False Alarm and even non-detection will appear
Configuration zone
1 - Choose your language and a measurement unit
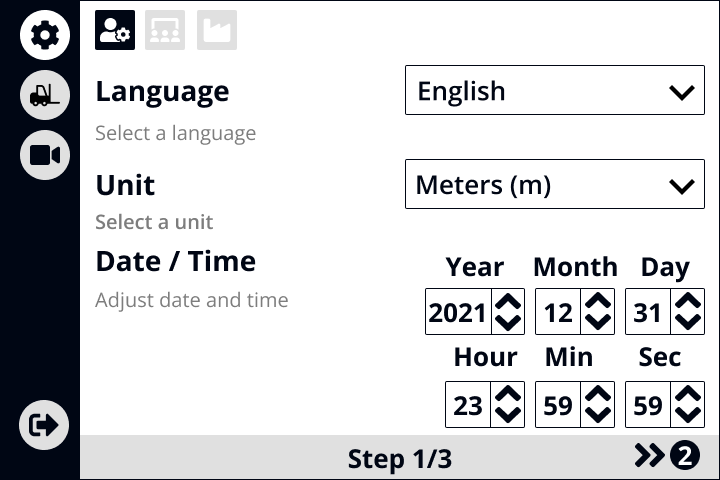
2 - Adjust the date/time if needed
Date/Time and IoT
The Blaxtair Origin system automatically updates the date/time when the IoT feature is activated.
3 - Click onto go to step 2 and select your vehicle
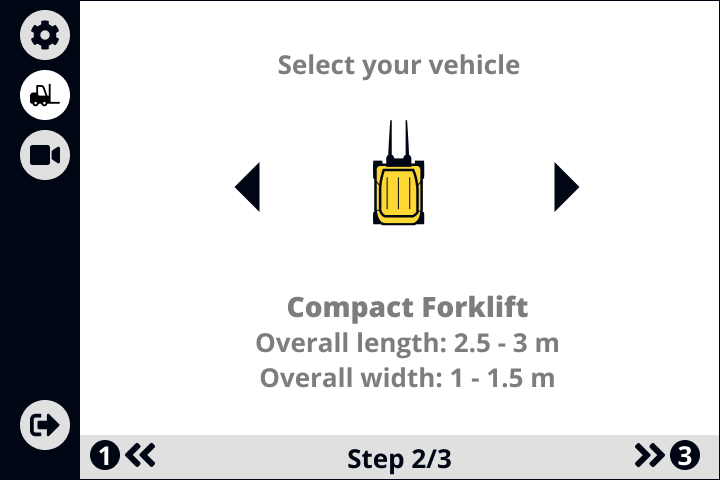
4 -Change the vehicle icon by clicking on Previous ![]() or Next
or Next ![]()
The Blaxtair Origin system saves the selected vehicle icon automatically
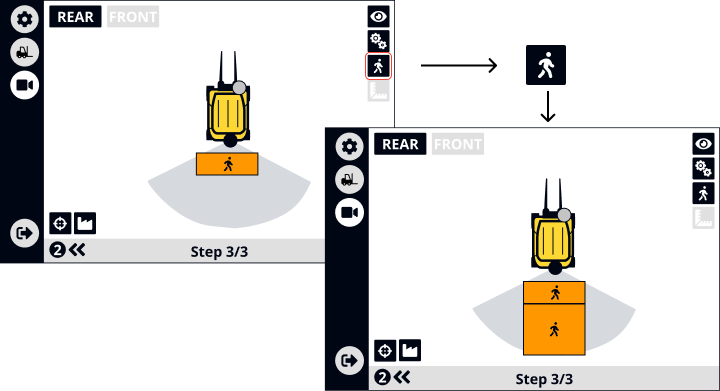
5 - Click on ![]() to go to step 3, adjust the camera position and set up your detection zone(s)
to go to step 3, adjust the camera position and set up your detection zone(s)
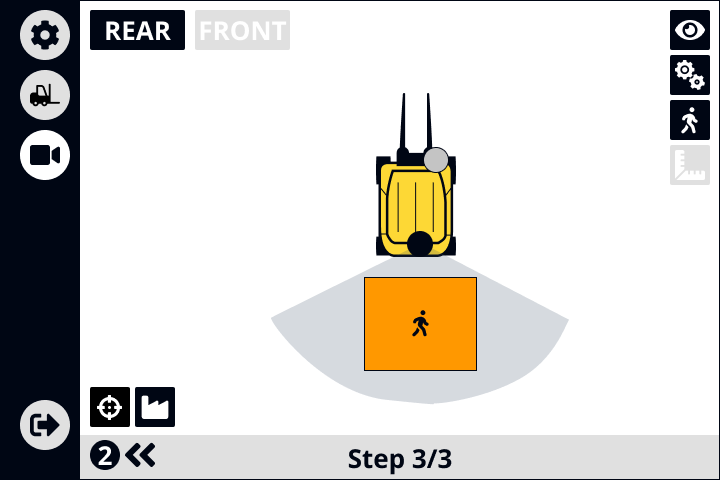
6- Configure the Rear and/or the Front camera(s) depending on your configuration
Rear configurationClick on
 to configure the Rear camera configuration
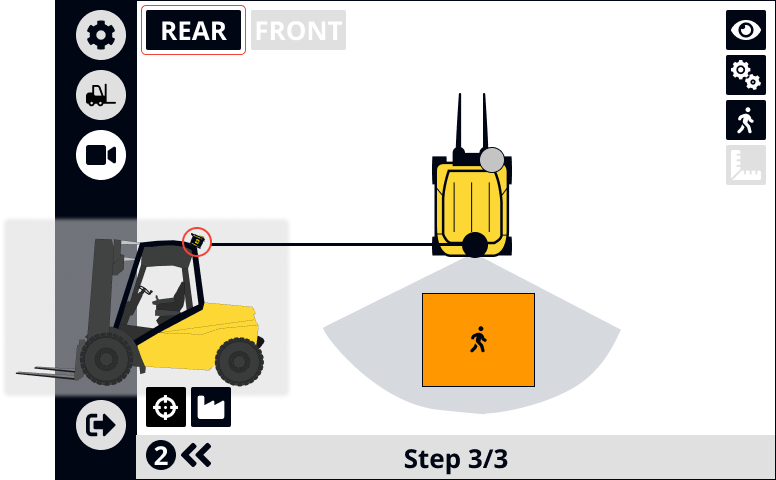
Front configurationClick on
 to configure the Front camera configuration
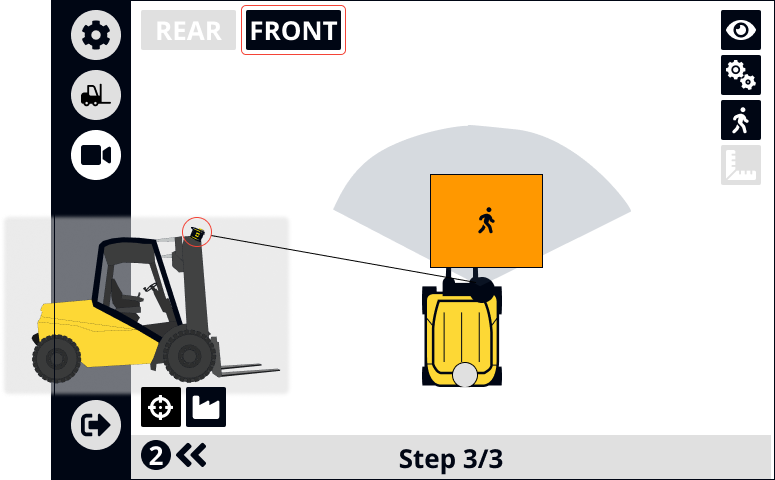
Camera activation
Click on ![]() to activate or deactivate the camera
to activate or deactivate the camera
7 - Modify the camera field of view orientation by using

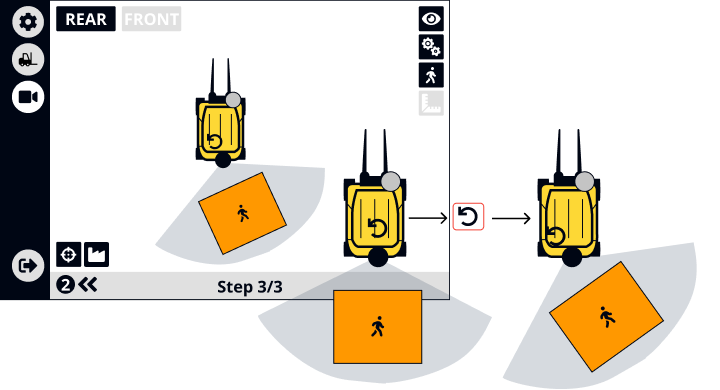
8 - When you select a detection zone, drag & drop the zone to change its position or click on a dot to adjust the zone size
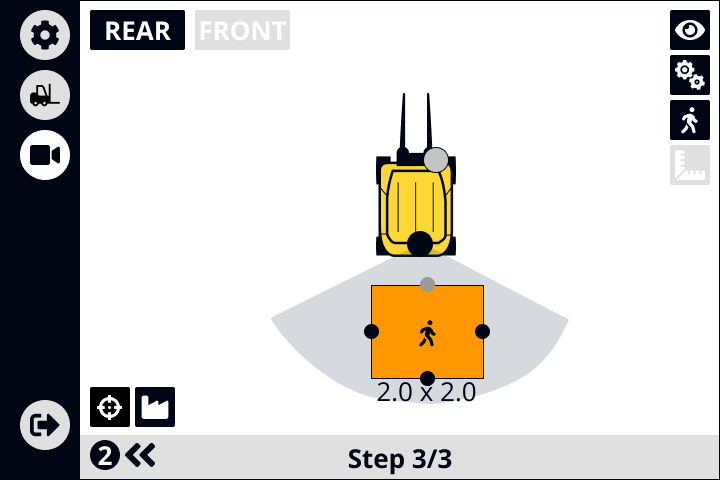
9 - Add a detection zone by clicking on ![]()
