
2.3 Installation
Please find the PDF version at this link.
BLAXTAIR - CHECKLIST INSTALLATION
Product versions
Case A: Installation steps for Checklist embedded to BXT Origin and Standalone versions | |||||||||||||||||||||||||
|---|---|---|---|---|---|---|---|---|---|---|---|---|---|---|---|---|---|---|---|---|---|---|---|---|---|
The Blaxtair checklist requires actions on the smart display and on the checklist dashboard to be functionnal. This paragraph presents the installation steps required on the smart display.
The smart display presents the following cables :  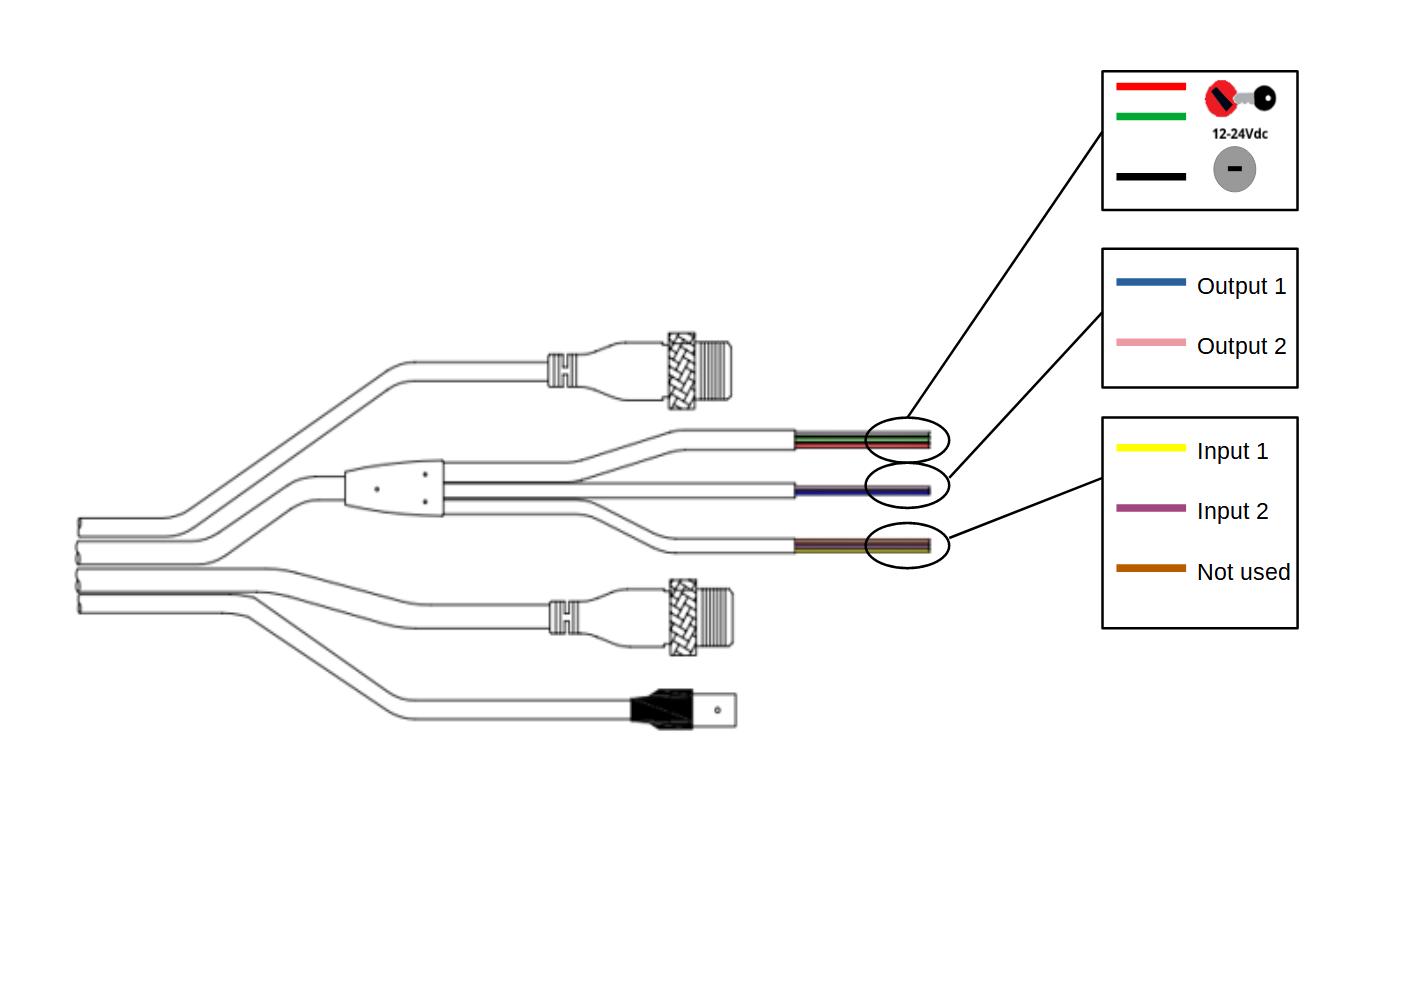 Power/ IGN (Ignition) / Ground :
 AND activated in the configuration of the ouputs AND
Smart display has to be locked in its cradle. We advise cradle to be secured with the provided screws to avoid smart display to be dismounted as smart display is not made to work without its cradle.
 After this step, for a checklist standalone product, the checklist installation on the vehicule is complete. Warning
 if BXTO is installed on the vehicle (see STEP 1), the following configuration shall be performed:
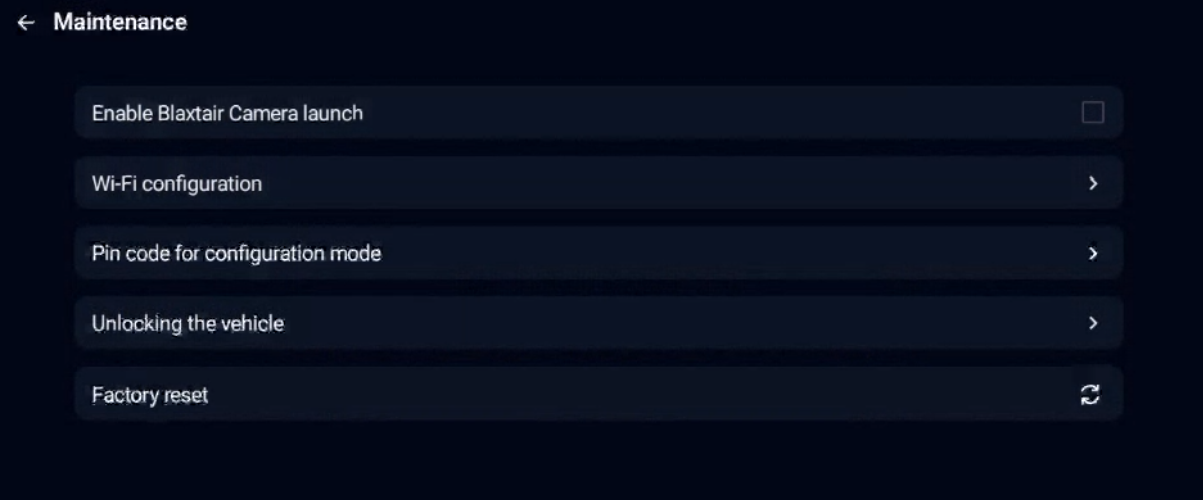 to activate link with BXTO, click on “Enable Blaxtair Camera Launch”. By ticking this option :
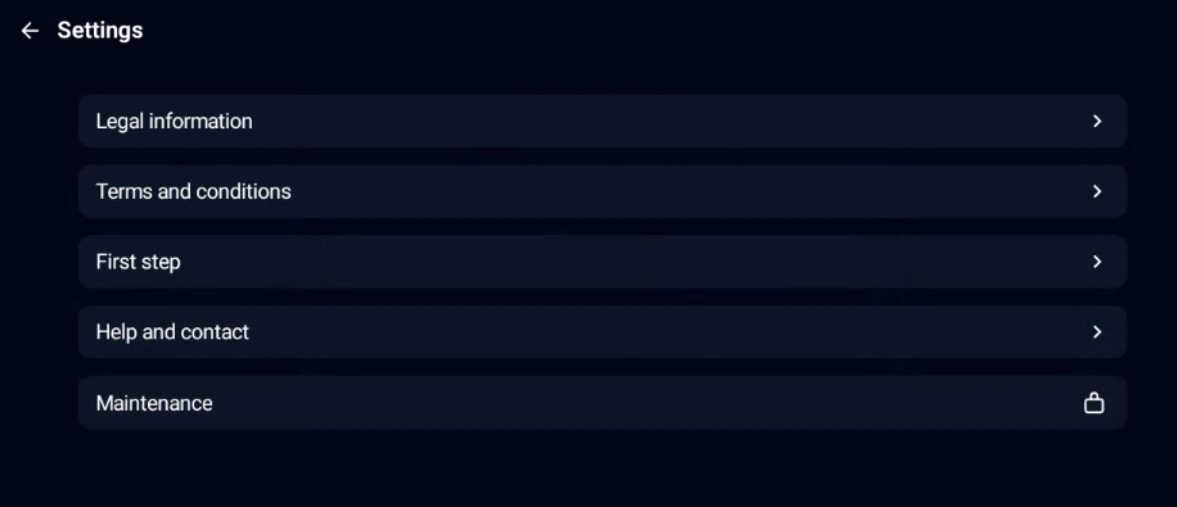
 After this step, Checklist + BXTO are ready to be used on the vehicle. Reminder : the following page can be accessed after clicking on “Maintenance” in the setting page and by typing related password. 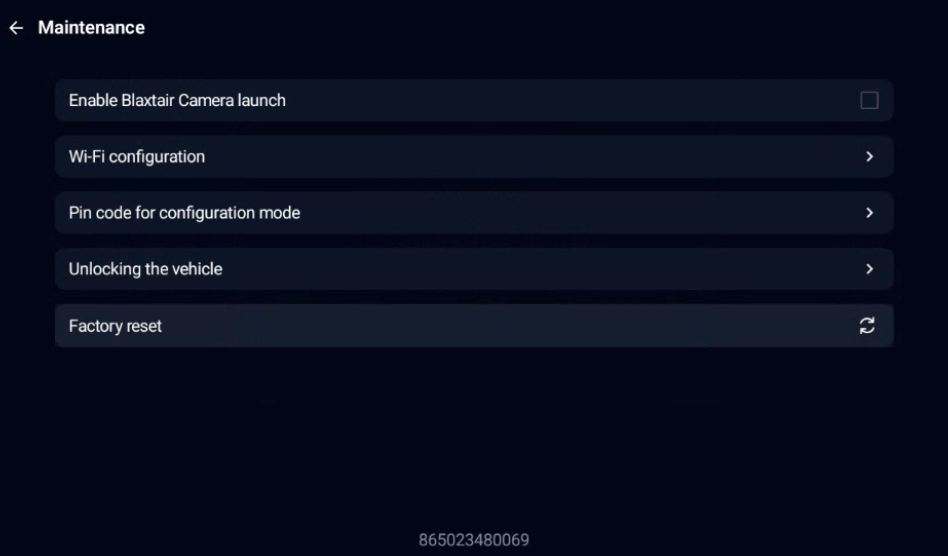

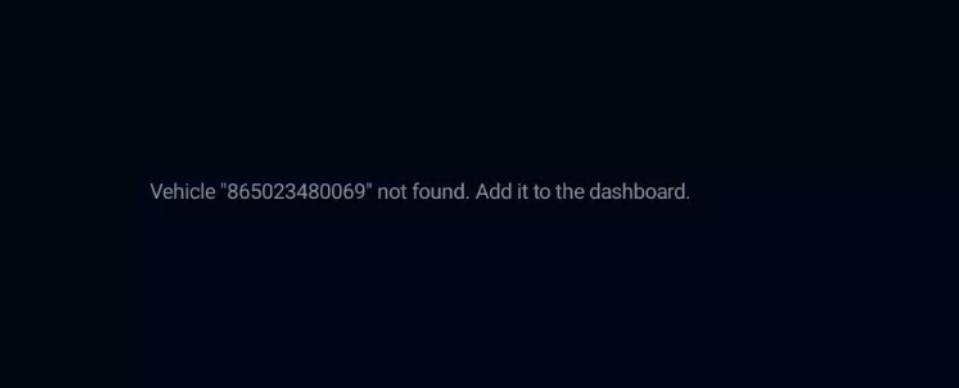
Connection between dashboard and checklistIt’s important to know when are connections done between checklist and dashboard as an update in the dashboard (change of checklist, etc.) will not be taken into account at other moments. Connection is possible only if network is available (4G/ Wifi) :
case of connection loss/ and retrieved :
| |||||||||||||||||||||||||
Case B: Installation steps for Checklist embedded to BXT MR130/MR260 | ||||||||||||||||||||
|---|---|---|---|---|---|---|---|---|---|---|---|---|---|---|---|---|---|---|---|---|
The Blaxtair checklist requires actions on the smart display and on the checklist dashboard to be functionnal. This paragraph presents the installation steps required on the smart display.
The smart display presents the following cables: Power/ IGN (Ignition) / Ground :
This step is mandatory for any checklist.
Smart display has to be locked in its cradle. We advise cradle to be secured with the provided screws to avoid smart display to be dismounted as smart display is not made to work without its cradle. To activate the license you need to have the “Checklist license card” ready. You should have ordered the “license for checklist” (kit ref. 699-980-008) to Arcure/Blaxtair and received the activation quick start guide (20250625_QSG_Checklist.pdf) and the license card. 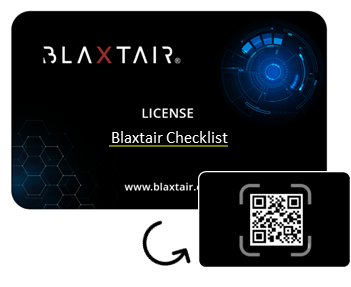 Below article will explain how to activate your license. An active Dashboard Connect subscription for the Blaxtair system is required before you can activate the Checklist licence. Dashboard activation is presented in the following Quick start guide: 20250626_QSG_abonnement.pdf 4G or Wifi connexion is mandatory to perform the next steps. 1️⃣ Go to “Enter code/QR code” 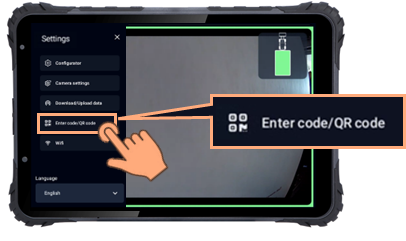 You will have to use your password which is 1235 by default 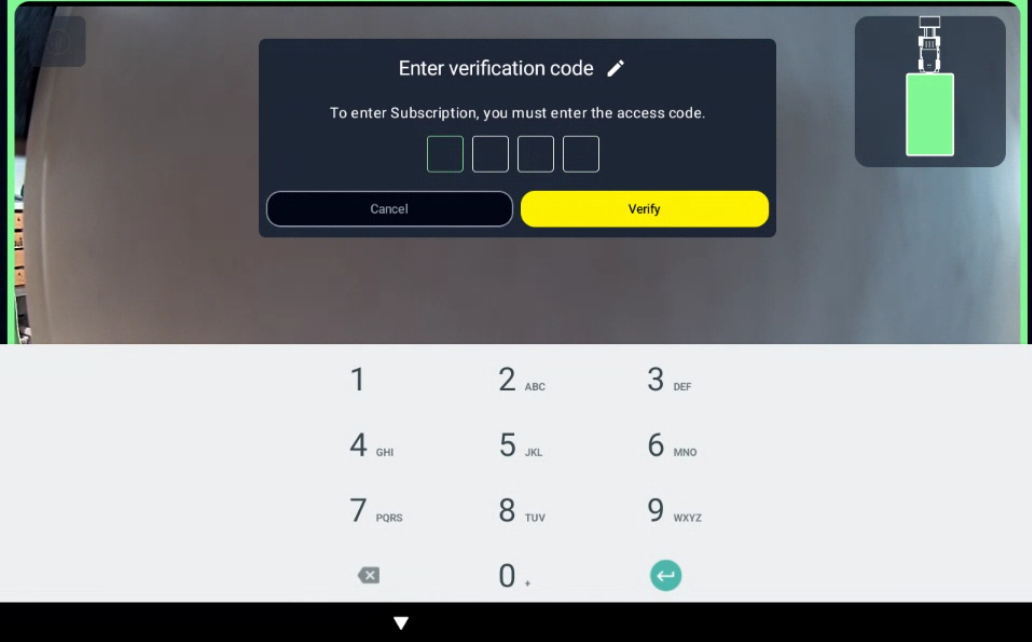 2️⃣ Enter the licence code 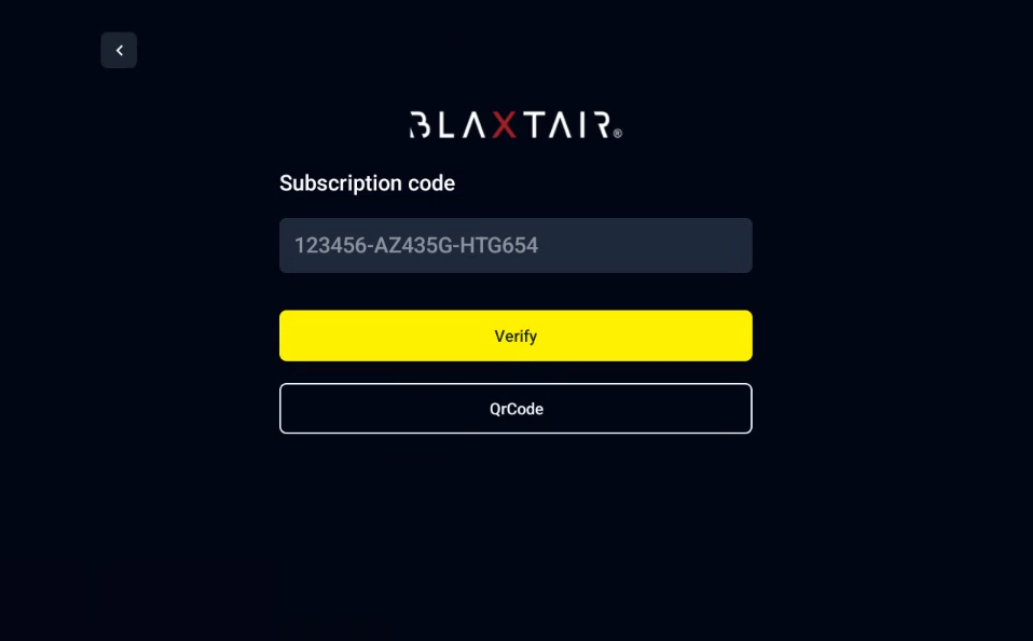 Once you reach this page you have two way to activate the code: Automatic (using QR Code) 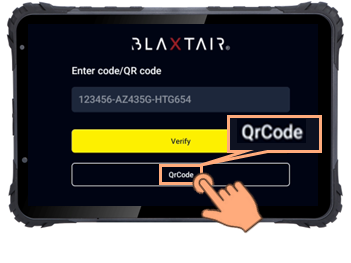 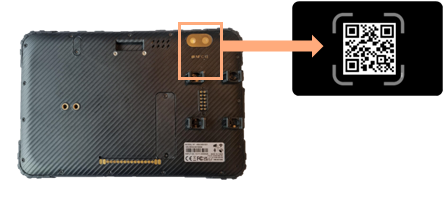  Click on “Verify”. 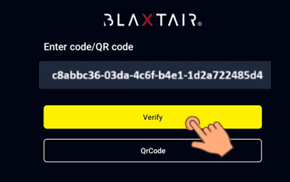 The desired licence will be checked/green and the screen displays: 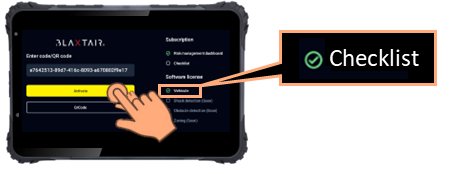 3️⃣ Licence activation Click on “Activate”. The screen displays: 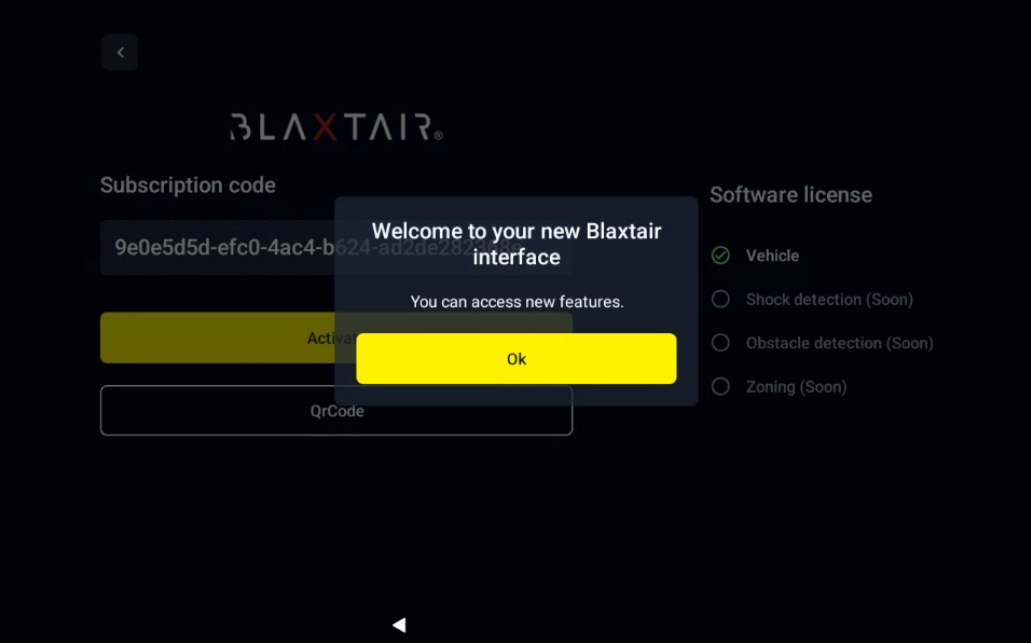 Click on “OK”. The checklist is active on the system. Turn Off/On the vehicle. A list of drivers should be displayed on the smart diplay:
or
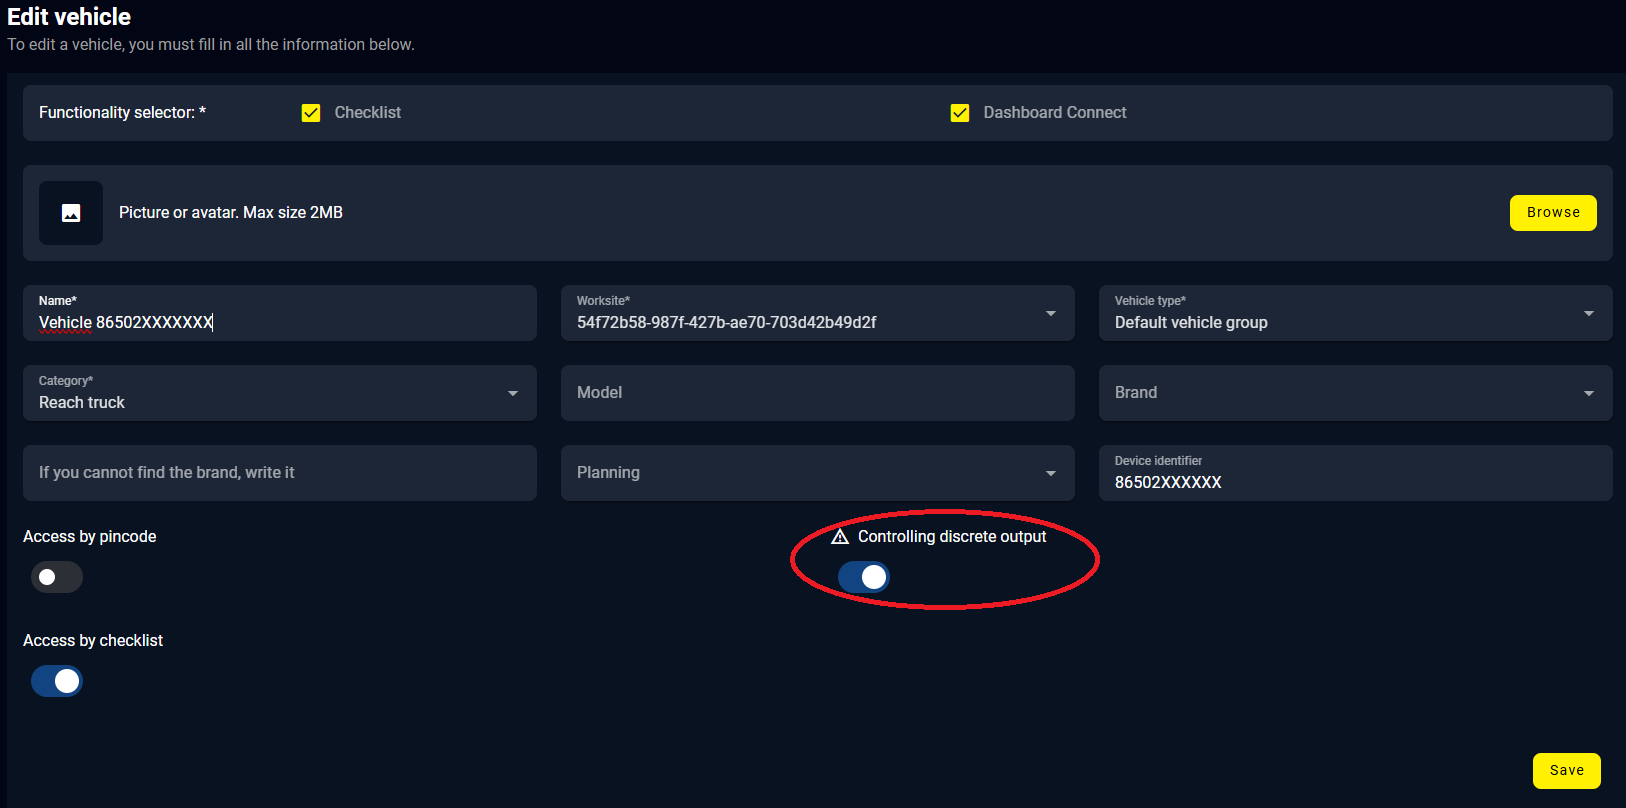
If no configuration is performed on the dashboard connect, a list of default questions is displayed on the smart display once a driver is selected. If the checklist is configured on the dashboard, the defined list of questions should be displayed on the smart display. For information, another option to enter the code is manual entry in the page below: 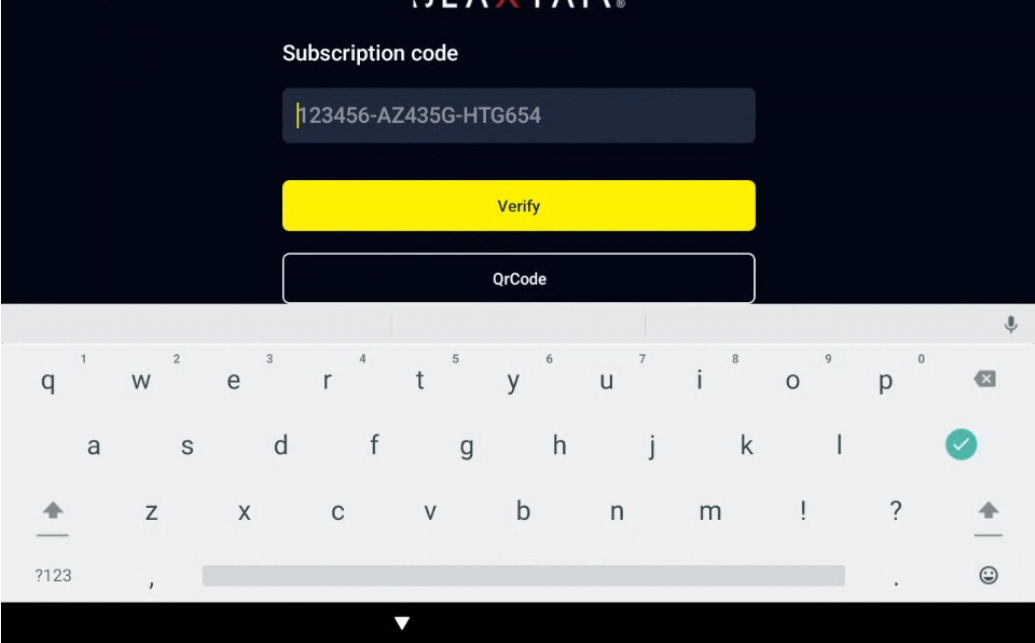 This paragraph presents the steps to activate the control of the discrete output using the checklist. This feature allows to interact with the vehicle depending on the state of the checklist. In order to interact with the vehicle, the output linked to the checklist shall be activated in the configurator. In order to visualize the checklist option in the configurator of the smart display, it is mandatory to activate the dashboard checklist option “Control discrete output” 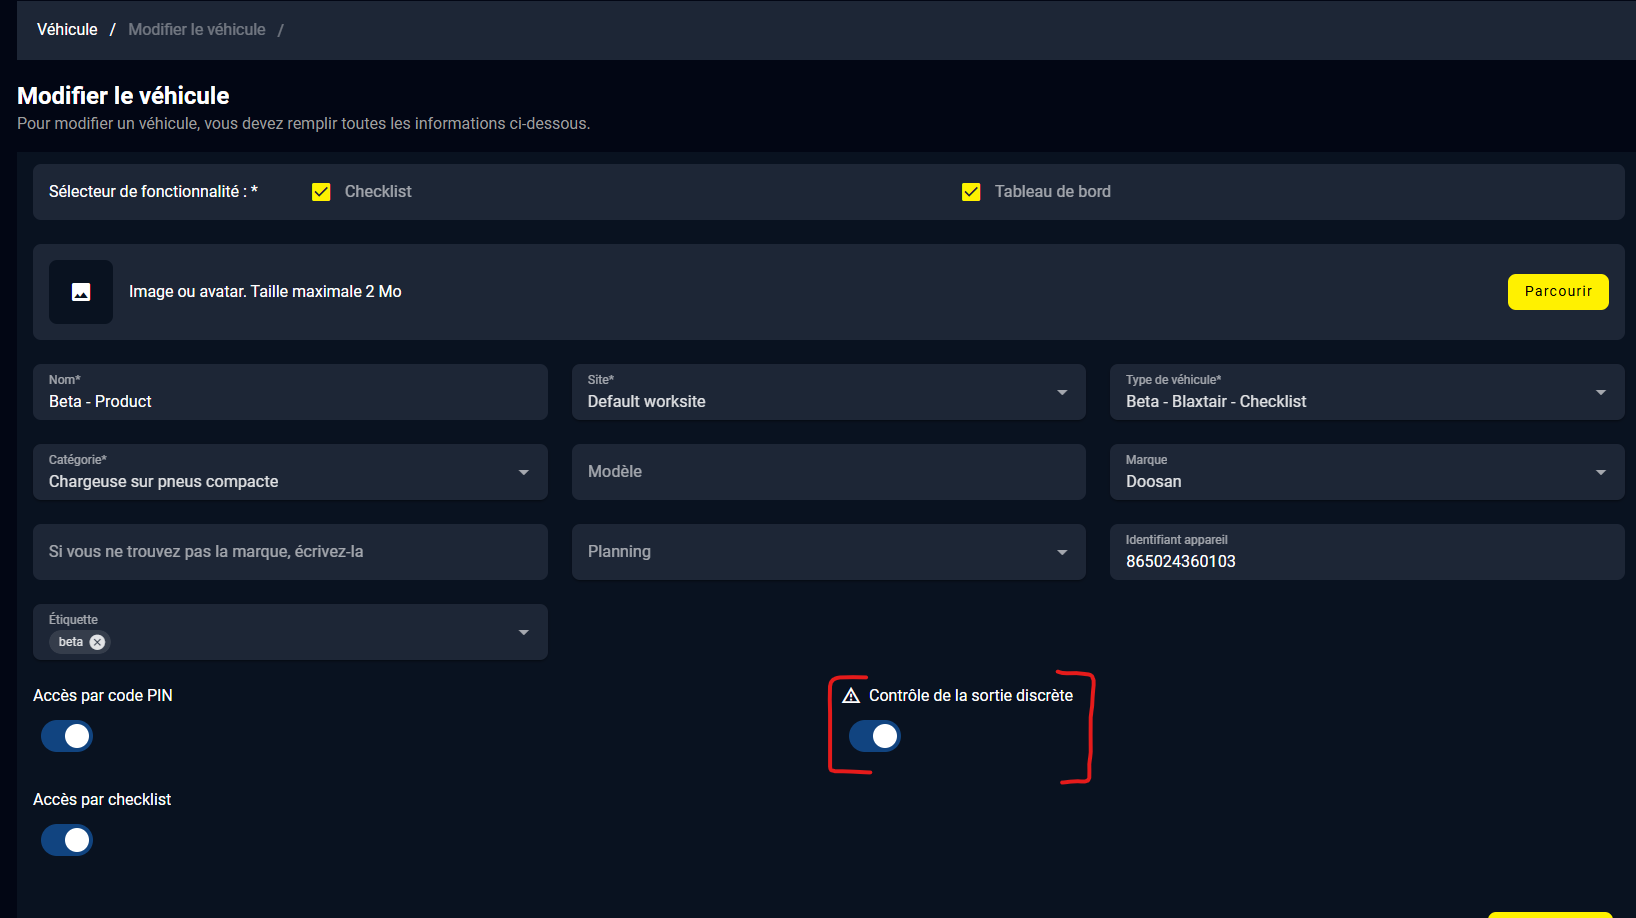
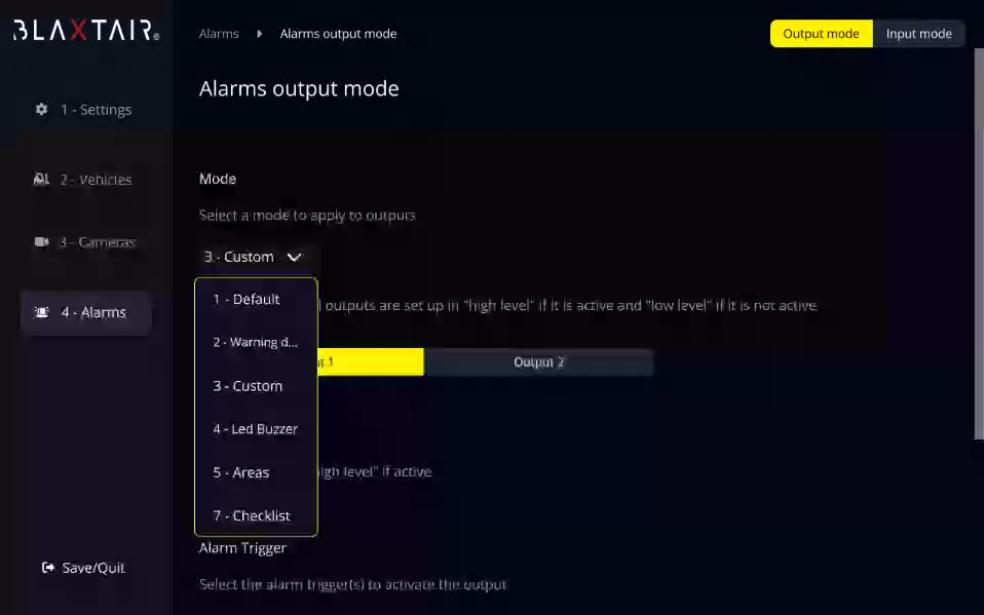
2.a. Select the mode 7-Checklist to activate the output depending on checklist state only. 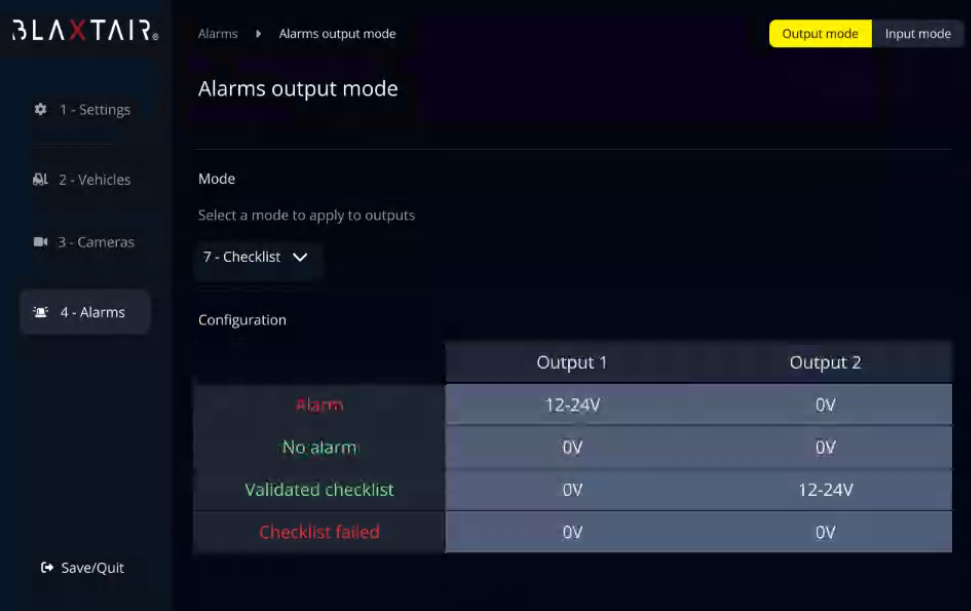 The output 2 is at 12-24V if the checklist is valid and at 0V if the checklist is failed. The output 1 is linked to the perdestrian detections. 2.b. Select the custom mode in order to select the output to be linked to the checklist. This mode allows also to combine different type alerts to one output. 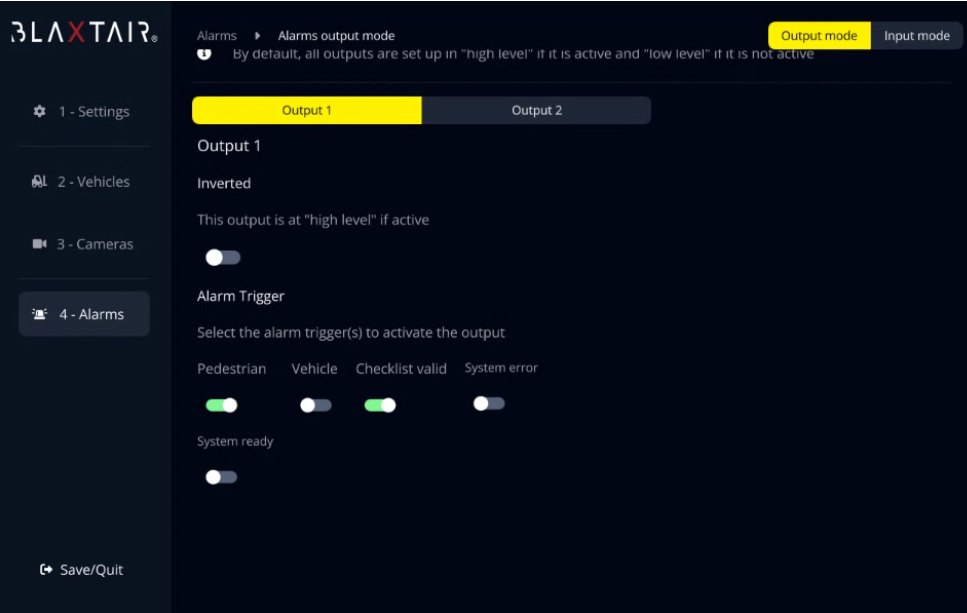 |