
3.2 Installation Shock Detector
Please find the PDF version at this link.
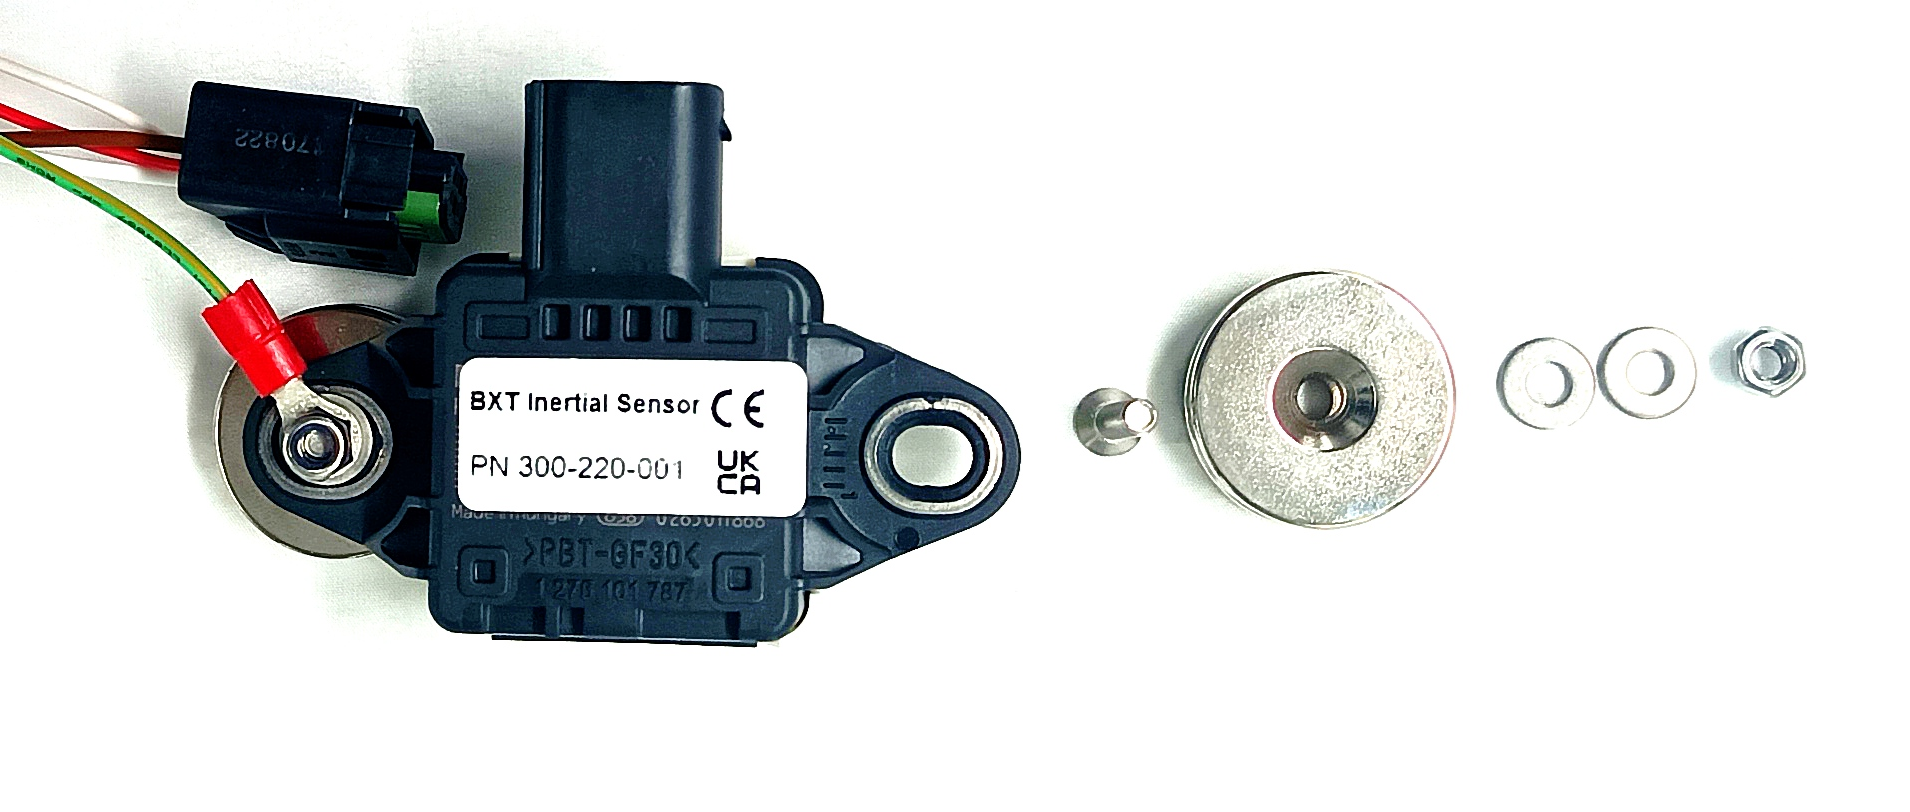
Sensor preparation
Before all the sensor must be fixed to its magnet mounting kit.
You must use the mounting kits provided in your product box to ensure that the sensor is correctly fixed to the vehicle.
2 magnets
2 M4 (25mm) screws
2 M4 brake nuts,
4 M4 spacers.
From bottom to top :
1st mounting bracket : Screw - sensor - spacer - magnet - spacer - brake nut
2nd mounting bracket : Screw - sensor - spacer - brake nut
 |
Mounting on vehicle
The sensor is mounted on 2 magnets and need to be installed on the vehicle chassis or a sturdy part linked to the chassis (the center of gravity of the vehicle is a nice to have but it is not mandatory).
Example:
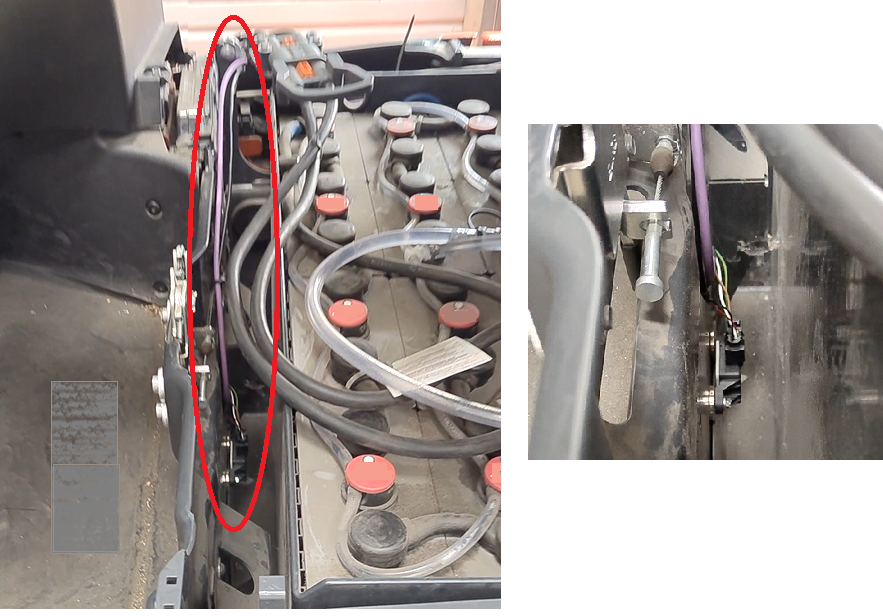
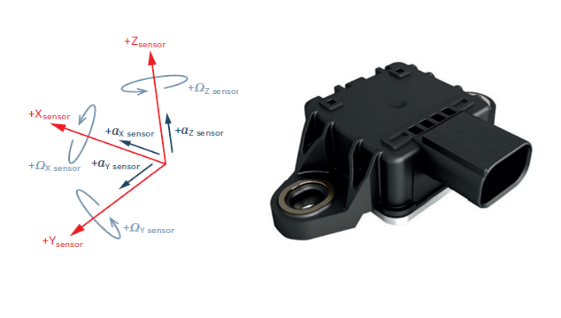
The sensor can be installed whatever the sense and direction as there is an axis calibration available on the shock detector feature (3.1.4 SHOCK DETECTOR CONFIGURATION).
ℹ️ Best practices
The vehicle frame is often flat and without deformation. It is the vehicle part where the sensor is usually mounted.
Wiring
⚠️Connection of the shock detector must be done the Blaxtair Origin system "off"
There are two cables available on the shock detector kit:
Main cable | 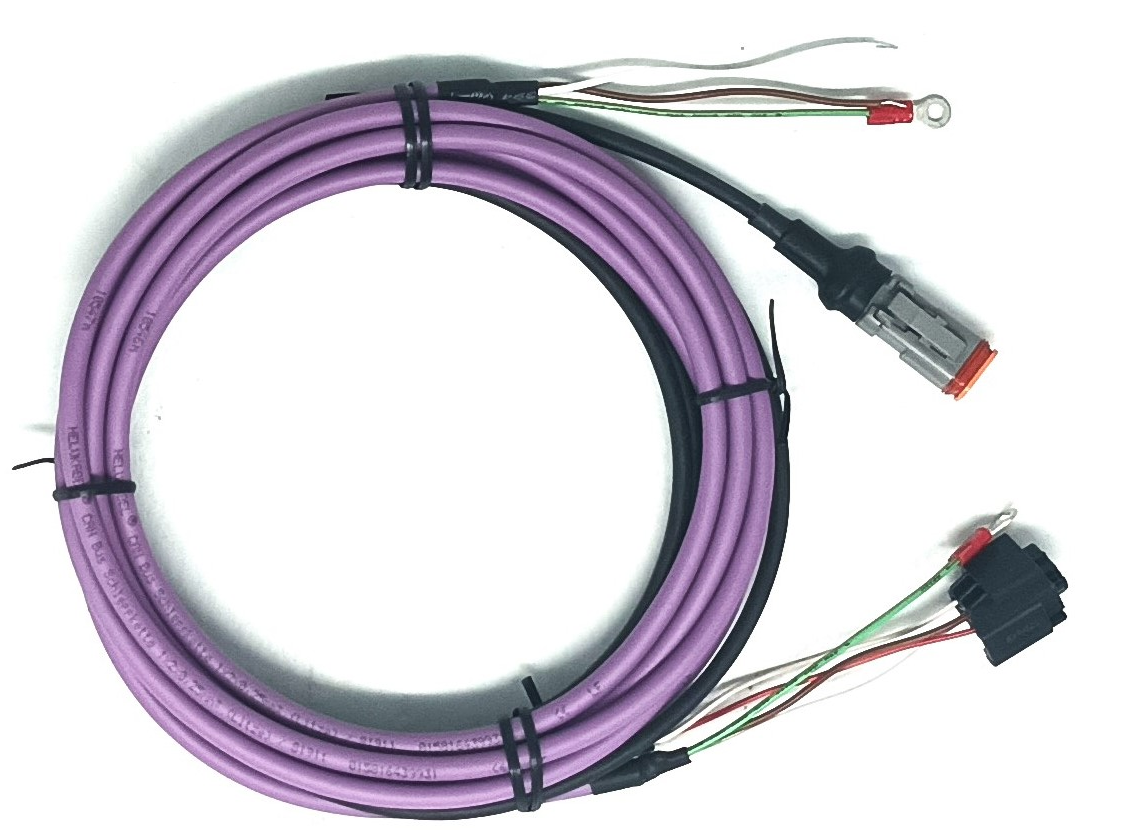 |
Power supply Y adaptation cable | 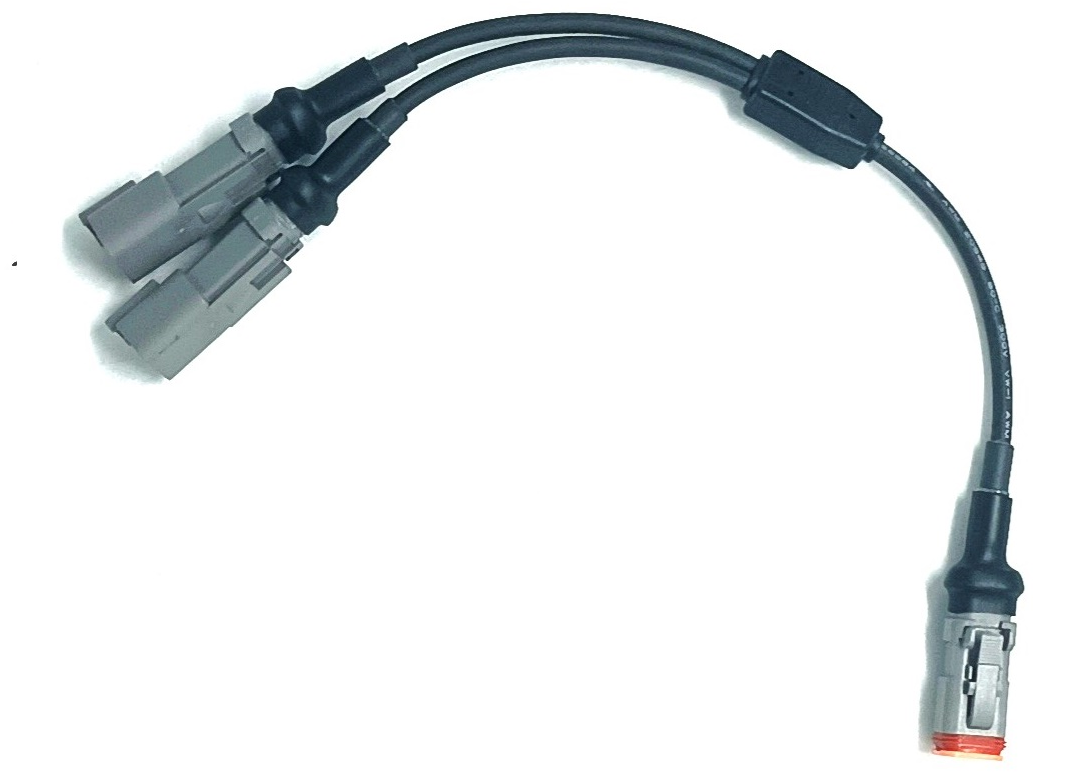 |
The shock sensor must:
be connected to the CAN-high and CAN-low outputs
Deutsch 2-way connectors ends on "BXT main cable" and "SHOCK DETECTOR main cable"
be connected and supplied with the 12V monitor outputs of the system main cable,
Bare wire ends on "BXT main cable" and "SHOCK DETECTOR main cable" + splice
Depending on the system with or without a display the cabling is:
System with screen | System without screen |
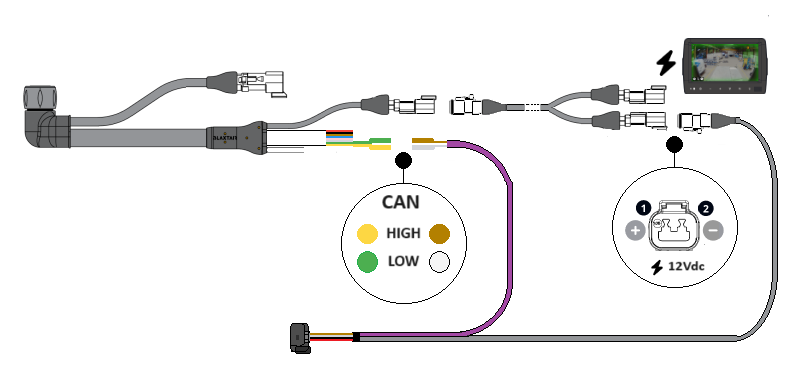 | 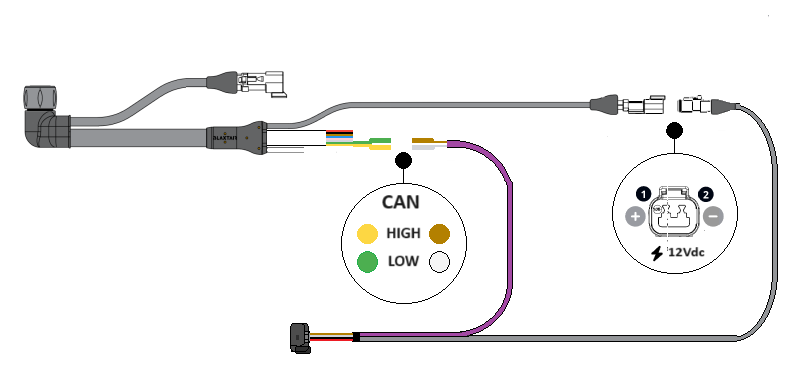 |
You are done with the installation. You now need to activate and set up the feature (3.1.4 SHOCK DETECTOR CONFIGURATION). < TO BE MODIFIED